Welcome to the second week of the Chestnut Sweater and Top Sew Along!
And this time, it's sewing week, yay! Finally we will start making the lovely Sweater or Top of your choice. As you will also see on the instructions, some steps work for both options and versions and some will not. Check which ones you need to follow depending on your chosen garment.
Also, for the purpose of this sew along and to make it a bit easier, I will be using mainly my overlocker and only the regular machine for specific steps, as well as a summarized version of the instructions' booklet, focusing on the more difficult or challenging steps. The instructions themselves come with the complete version and lots of technical drawings to guide you through the whole process. The seam allowance is 3/8''/1cm
Now... Let's sew!
Stay stitch the neckline
Sweater and Top all versions
Stay stitch (a line of machine stitching just inside the seam allowance that usually goes around necklines and similar curves to prevent them from distorting/stretching) along the necklines of the front and the back pieces from the shoulders to the center of both pieces, using a 0.5cm seam allowance and a zigzag stitch on your regular sewing machine. Do the same with the facing of version A.


Stabilize the shoulders
Sweater and Top versions A & B
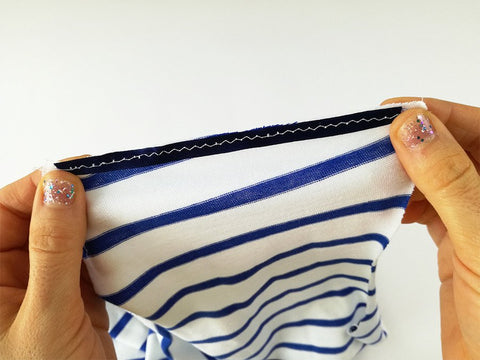
With your overlocker or your regular sewing machine (and a zigzag stitch), join shoulders with right sides together. Here you can also stabilize them with a piece of ribbon that will run along the shoulder seam, within the 3/8''/1cm seam allowance, and that you need to zigzag stitch to the shoulders prior to joining them together. Another option is to use stay-tape.


Example of shoulders with overlocker:


Sweater and Top version C - slits
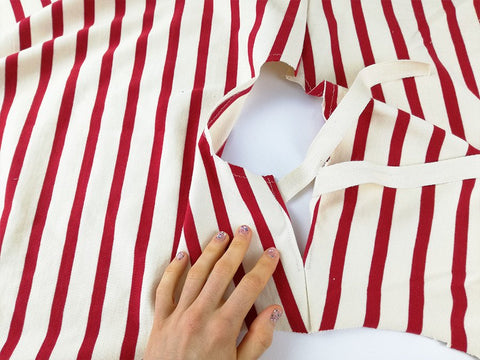
If you have chosen version C of either of the two main options, you need to sew your shoulder slit and add your bow to be able to finish the shoulders. Use your overlock or regular machine joining both front and back with right sides together at the shoulders and stopping at your slit.
To create a nice slit, also known as vent, keyhole or opening, fold the two seams of the slits in (wrong sides together) by 3/8’’/1cm and pin. Take your two pieces of ribbon and place them at each side of the slit next to the neckline and following the placement mark found on the front and back bodice pattern pieces. The ribbon needs to sit 1 cm away from the neckline.

Before stitching, the two ribbon pieces need to be folded again to the opposite side so that the two face each other and the ribbon is caught again on the seam. Now topstitch all along the slit, pivoting in the middle and down on the other side, using a 0.5cm seam allowance. You can take out the pins as you go or before keeping the pieces in place.


Your slit and bow are now ready!

So you can finish the rest of your neckline by using your overlocker (finish first the raw edge if you want to) or straight to the regular machine using a zigzag stitch or a double/twin needle. Either way, you just need to fold the neckline inwards wrong sides together by 3/8''/1cm and stitch starting at the front slit and finishing at the one in the back shoulder.
If you are using your double/twin needle for the first time, here's a quick guide:
1. Put your double needle in place.

2. Take your extra spool holder and thread (same colour as the main one) and put in on the little hole your sewing machine has above, near the normal thread holder.

3. Choose either a straight stitch or a triple stitch (these varies depending on the machine) and start sewing!


Always test how the stitch looks on a scrap of fabric so you can change the tension if necessary and practice.
So now you've got part of your sweater or top done. More tomorrow!
Happy sewing!
xxx
Ana
