Tutorial on how to copy your favourite top
Hello, hello ladies and any gent there? :)
Here I am back with a new post and this time I am telling you a secret so shhhhhh let's keep it between us, ok? I HAVE COPIED MY FAVOURITE BRETON TOP EVER! Ups! A bit loud, right? But who can resist screaming from the roofs that you can recreate your most precious (but already old) Breton top in just a few hours? :) So, that's eaxclty what I am going to show you today. Everybody ready? Let's do this!
*One! This is the top I am talking about (the one with the red stripes) from a well known super cute French brand (hehehe). And the other two stripy ones are the fabrics I chose. Pretty similar to the original although not as consistent (I haven't found yet that same type of gorgeous cotton jersey, argggg). These two I bought from the Eternal Maker.

*Two! Choose your tools. All these will help you with copying any of your clothes + for creating your own patterns or modifying the ones you bought. From left to right: Pattern master, measure tape, pencils, tracing wheel, fabric and paper scissors, masking tape, paper pattern, French curves and one of the most useful, a simple white board (so that you can pin on it. Choose A3 or A2).

*Three! Place your top over the pattern paper (that is already over the foam board) as flat as possible and pin on strategic points such as the neckline, shoulder, side seams and hem. This way you will have a better picture of the different pieces you need to copy and transfer to the paper. I did this step by folding the top in half to get the front and back bodices ready to cut on the fold later.

*Four! Now pick up your tracing wheel (if you don't have one, even though I really recommend getting one because it's great! you can just use pins all around like I did on the previous picture making little holes on the paper and on the actual board). If you have the wheel just go all along the sides of the top copying the shape. I did first the bodice and then the sleeves on a different piece of paper.

*Five! Here you can see the little dots that the tracing wheel has made and the same will happen if you use pins. Now, with your pattern master and a pencil, join them to start creating the shape of the top. To make sure the measurements are ok just use your tape and check the top and your copycat pattern. Also! For the armhole and neckline, I used pins (just as I explained on the previous step) to mark then the lines.
Do the same with the sleeves and after that, add your seam allowance everywhere! I chose 1.5cm but as we are using some precious fabric here, I would suggest 1cm is plenty.

Here you can see my pattern ready for cutting with the back, front and sleeve. I am sure there are other ways to do it, better or different ones, but this here just works perfectly well for me :)

And now for the sewing part!
*Some tape to stabilize the shoulders using a zigzag stitch.


*Join the shoulder seams right sides together front and back with a zigzag stitch and finish the seams with your overlocker.

*Attach the sleeves as you see on the image. It is the best way to do as it is a very low shoulder top so it's not set in.

*And now join the under seam of the sleeve and the side seams of the top all in one long zigzag stitch and finish the seams with your overlocker.


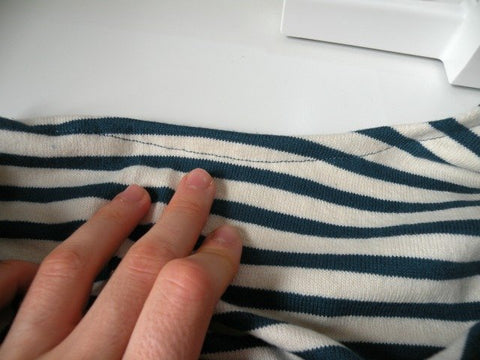
*And now for the week. Use your overlocker to finish the raw edge and just turn it over and stitch (use a zigzag stitch instead of the straight one I used. It will work better). You can also use bias tape or any other method you prefer to finish the neckline.


*Do the same with the sleeve hem and the bottom one.

*And you will be done! A super quick Breton top from copy to sew it to wear it!


Hope you liked this super long post and see you very soon! :)
Happy sewing,
xx
Ana
