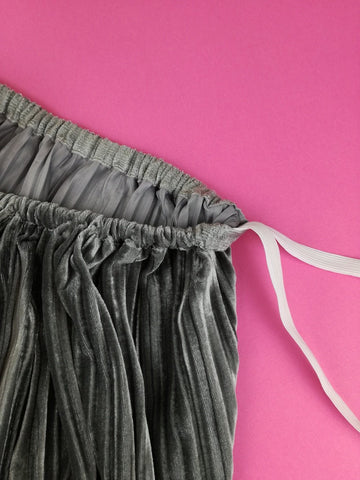
Sew a pleated velvet skirt
With this easy skirt tutorial, you will be making one of the trendiest garments recently seen on the high-street, the pleated velvet skirt :) Would you like to make one? It is super easy if you follow these steps :) Let's get sewing!

Materials you will need
_ 1.50cm of a velvet pleated fabric with a bit of stretch (if you want to make a similar one to the one I've made. You can also choose any other pleated fabric to make a version for Spring or Summer!)
_ 1m elastic for the waistband.
_ Matching thread.
Tools
_ Sewing machine (if you've got an overlocker you can finish the seams with it).
_ Fabric and paper scissors.
_ Measuring tape.
_ Pins, needles.
_ Pattern paper or similar.
_ Walking foot, optional (it works great with stretchy or slippery fabrics).
_ Needle for stretchy fabrics (if you use one similar to the velvet used on this tutorial).
Now, let's start making :)
Steps to create the pattern for this easy skirt tutorial:
The pattern for this skirt is very easy to create. On one hand you can take your measurements directly to your fabric or you can draft the pattern pieces on paper and then cut. So here are the step:
Step 1. Measure your waist (the smallest part) all around. Add 4cm to this measurement for the seam allowance and another 2cm if you want the skirt to have a more gathered waist. If not, just add the 4cm mentioned. Then divide the number for 2.
Formula: Waist measurement + 4 (+ 2 optional) / 2 = This will be the width of your front piece and of your back skirt
Step 2. Now, you can go directly to your fabric and cut 2 pieces following this measurement also choosing how long you want your skirt to be. Mine has a midi length, but you can choose whichever you like. You can also copy this measurements and create a rectangular piece on paper and then use it to cut your fabric. If you are using a pleated fabric, make sure the pleats are on a vertical direction before cutting.

This image is in Spanish as I did this tutorial for the Spanish version of Mollie Makes but you can see how the piece should look.


Step 3. If you want for your skirt to have pockets (and of course you want, hehehe), draw something similar to the illustration below or use any pocket piece from an existing pattern if that is easier for you. This skirt has a 1cm seam allowance, so add that much to the pocket side seam and cut 4 on your chosen fabric.


Now you have your pieces ready to start making your lovely skirt :)
Steps to sew this easy skirt tutorial:
The pattern for this skirt is very easy to create. On one hand you can take your measurements directly to your fabric or you can draft the pattern pieces on paper and then cut. So here are the step:
Step 1. Grab one of the pockets and place it with right sides together on one of the side seams on the front skirt piece and pin. Do the same with the other 3 pocket pieces. Place them on the seams of the back skirt piece and on the other front skirt piece. Make sure they are leveled. Mine are 10cm away from the top of the skirt.

Step 2. Sew the four pockets to the front and back skirt pieces using a zigzag stitch if your fabric has stretch or with a regular straight stitch. Use a 3/8''/1cm seam allowance.

Step 3. Press the four pockets away from the skirt as shown below.

Step 4. Place front skirt on top of back with right sides together and making sure the pockets stay on the outside. Pin in place from waist to hem and around the pockets.


Step 5. Stitch side seams using a 3/8''/1cm seam allowance and around the pockets. Use a zigzag stitch if your fabric has stretch or a straight stitch if not. Start at the waist and finish at the hem. Do this on both side seams.

Step 6. Finish the seams with your overlocker or with pinking scissors.

Let's create the waistband
Step 7. Fold the waist wrong sides together inwards by 2-3cm to create the tunnel where the elastic will be placed. Here you need to have in mind the width of your elastic. Pin.

Step 8. Stitch the waist all around leaving a space of around 4cm to introduce the elastic.


Step 9. Take the elastic and with a safety pin on one of the ends start passing it through the tunnel till you reach the other end of the space you left unstitched.


Step 10. Before stitching the ends of the elastic, try your skirt on again and adjust accordingly. Then, stitch both elastic ends together and close the gap you left on the previous step to close the tunnel.

Step 11. Hem your skirt if needed (mine, thanks to the fabric, didn't need it!) and you are done! :)


Now give it a good press if your skirt needs it and it is ready to wear!!


Hope you like the post about this easy skirt tutorial and happy sewing!
PS. Don't forget to check all the CocoWawa sewing patterns here for more sewing and our YouTube channel and social media.
Ana
xxxx
